Wide DOF – Beach. Test and Final Shot.

The sun beams at the beach as the sun was going down were amazing and I though it would be worth going to shoot a wide DOF shot. I tried a couple of test shots using the manual setting. Initially the aperture was f10/1/500 but the shutter speed was too fast and resulted in under exposure. I then went to f/10 1/40 but this was over exposed ad looked flat and cold, removing the sunbeams from the shot.

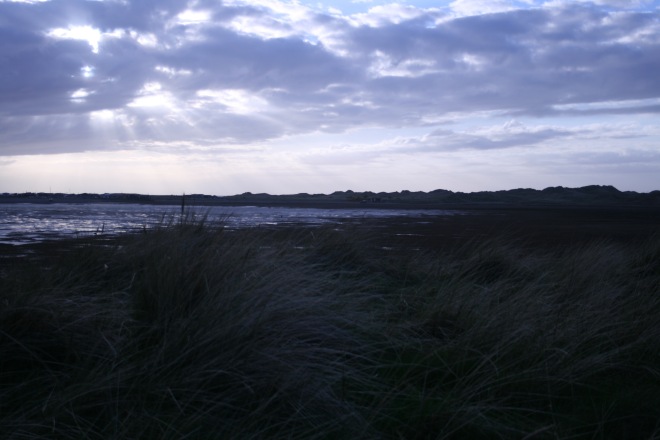
I then started to get closer to a final shot and decided to use the tungsten WB setting to reflect the cold chill despite the sun being out. The setting enhances the sunbeams  in the skyscape but the beach turns a bit silhouette, but not enough as there’s still some detail present.

IMG_2450
f13 1/160 ISO 100 WB Tungsten – nearly silhouette

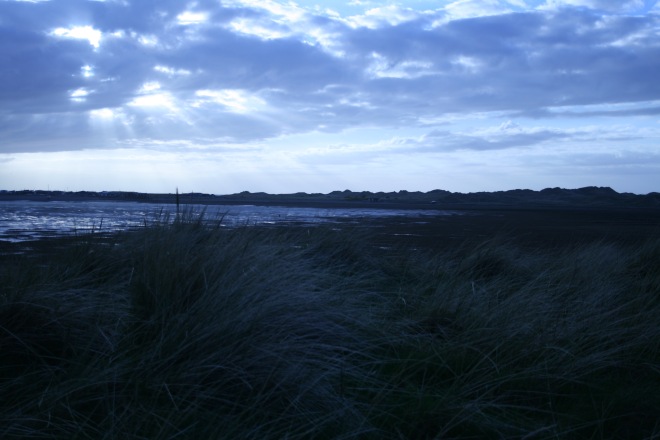
By slowing down the shutter and allowing more light I managed to get a final shot that captured the amazing sky and the detail of the swooping beach. The wide depth of field stretches out to sea and captures the amazing beams landing on the sea in the distance. I think the composition of the diagonal sand swooping out to the lit sea really takes you on a journey to sunny warmth even though it was cold. Taken on a Monday and as a nod to New Order, I’d call the shot Blue Monday.

IMG_2450_3
f13 1/80 ISO 100 WB Tungsten – Final Shot

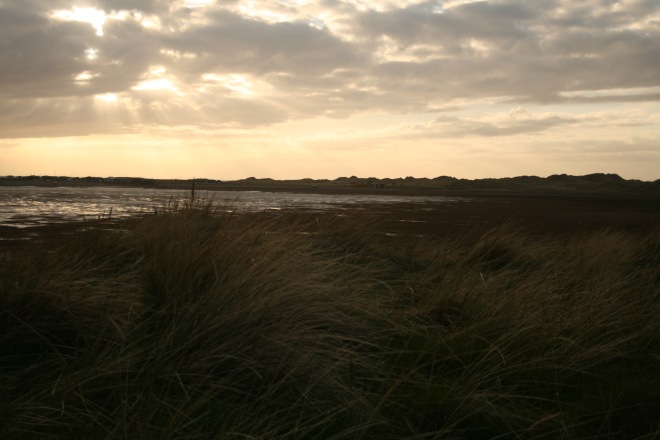
I’ve also included some warmer shots by using a wide depth of field and the cloudy and daylight WB options adding some yellow/orange tones.

IMG_2456 copy
f13 1/80 ISO 100 WB Cloudy

I paricularly like the composition of the below, there is lots of untouched sand ripples in the foreground which leads you to the midground sand dunes and then further out to sea.

IMG_2419.jpg
f8 1/500 ISO 100 WB Daylight
Wide DOF – Beach. Test and Final Shot.

White Balance & Kelvin Scale

White balance is how your camera perceives colour.

There are 3 types of light source:

  • Sunlight = Yellow
  • Reflected Light = dependent on the colour thats been reflected, green fields, blue sea.
  • Sky Light = Blue

Skylight always has the biggest impact as it has the biggest surface area.

When indoors we use tungsten/incandescent bulbs which have a warm yellow/orange hue. If you have a piece of paper under these light conditions it’s still as white as it would be under skylight, as our visual senses adapt to make it white. however the camera doesn’t have this filter – which is why if you take a photo of a white piece of paper under lamps it would have a yellow tinge.

This is where white balance comes into play to compensate and adjust according to shooting conditions.

Colour temperature is measured in Kelvins on the Kelvin scale. Below are examples of this. Candles a house hold lights are seen as warm/hot colours but technically as cool heat, daylight is then blue, which should be remembered as really hot heat, blowtorch blue!

colour-temperature

By using the white balance settings on my camera I can adjust the white balance depending on the conditions, icons seen below. If I was shooting under tungsten light the camera would add more blue too even the tone out. similarly if I was shooting in the shade it would add more yellow to warm it up. Usually Auto finds the right tone, however it’s good to be able to have control and use creatively where necessary.

white-balance-settings-display

I tried some different shots using different WB options, which can be seen below. I think it’s great that you can enhance the temperature or create something creatively interesting by using the opposite of what you need. I like how the shade setting is adding some warmth to quite a chilly evening, this would be good to use on a sunrise or sunset to emphasise the warmth too. Similarly the magenta hue on the fluorescent setting would be good for sun set. The blue tungsten setting gives a really chilly feel but enhances the sky.

By using JPG RAW you can alter the WB in after effects/photoshop which is worth bearing in mind as you may want to enhance an image that looks a little flat.

Gallery