Fruit – Kiwi – Unit 2 Test Shots

Inspired by Francesco Tonelli and his close up detail work, I decided to take an interesting fruit, the kiwi, and capture it’s detail with a Nikon D600 with a macro lens. I was shooting in natural daylight and had a fill board to hand to knock back any shadows.

I started with some shots of the kiwi whole as the furry texture and shape, although fairly boring in comparison to the inside, still has some interest.  I was shooting on ISO 320 as I and had a 1/125 shutter speed which was fast but still allowing enough light in as the sun was getting brighter. I went for a f/8 aperture initially as a middle ground. I used the fill board as soon as I could see how dark the shadow was.

I then moved onto the cut centre. I found it quite hard at first as the centre was really wet and juicy and it was heard to know where to focus and get some nice detail.

I waited 30 minutes to let the initial juice to dry out a little. I felt the subject texture was more prominent and easier to focus on. See below. I made the aperture smaller to try and get more in focus and a wide depth of field, although shooting top down it probably didn’t matter too much. I used the fill board here too to eliminate dark shadows. The exposure could have been a bit brighter I think, but I didn’t want to slow the shutter down too much as I was without tripod, and didn’t want to up the ISO too much and lose sharpness. I could brighten in Photoshop if necessary. I could also crop in to the kiwi more eliminating the white space around the subject.

DSC_2973
ISO 320 75mm f9 1/125 with fill reflector on shadow


Below I dropped the f/number to create a wider depth of field, knocking out the secondary kiwi. I focused on the seed of the kiwi face in the foreground on the right hand side. It has picked up the detail and furry edge really well. I think it is probably a tad under exposed, even though I dropped the f/number to allow more light to come in, I compensated this by reducing the ISO., when really I probably could have left it at 320.

DSC_2986
ISO 200 75mm f7.1 1/125 with fill reflector on shadow

Over all I’m happy with the test shots but think there is probably a nicer more exciting way to shoot the subject and get even more detail such as this stock image from Shutterstock below. The item is back lit and really pops in both colour and detail.

stock-photo-fresh-kiwi-background-supermacro-back-lit-97994426

Fruit – Kiwi – Unit 2 Test Shots

Dairy – Egg-cellent – Unit 2 Test Shots

I think there’s something really nice about eggs. They look so smooth and have so many different tones. I’m trying to shoot food from different food groups and this would fall into the dairy category nicely. My other options were stilton or milk.

I started with some test shots using the Nikon D800 with a 85mm macro lens in daylight/cloudy day.

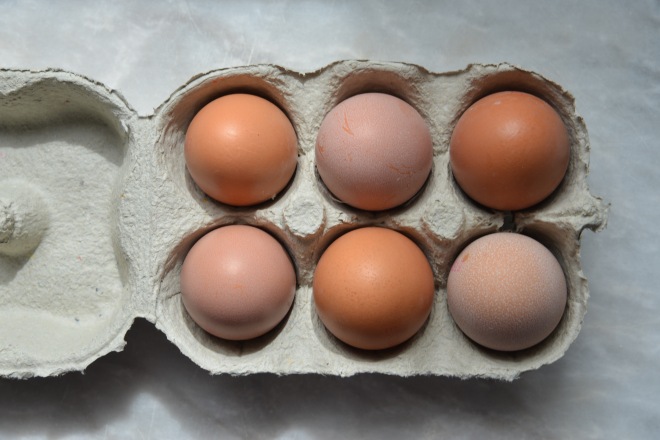
I started with a top down composition IS0 200 85mm f5.6 1/60, the shutter is quite slow to allow enough light in but I dropped this to 1/50 as felt it was slightly over exposed.

These were slighting too dark so I dropped the ISO to 125 which gave me an exposure I was happy with. (Below) I also like the lighting and shadows. I considered using a fill board but felt it would make the image flat.

DSC_2925
ISO 125 75mm f11 1/50


I then moved on to a side on approach which I liked also. I set the ISO to 200 and the shutter to 1/200 which was much faster than previous as the sun was coming in and out thus brighter, so needed to stop as much light going into the lens. I kept the 5.6 f stop to allow some shallow depth of field, the main focus being on the front speckled egg. I like this shot but think it could be stronger – I was going for a 2/3rd composition but I think the exposure is too dark and the background is distracting.

DSC_2942
ISO 200 52mm f5.6 1/200

I’ve gone for a close up of the speckled egg here with a shallow dof using an f/5 aperture knocking the other eggs out. However, the shot could have benefited from the ISO being increased allowing more light sensitivity and a better exposure.

DSC_2952
ISO 200 52mm f5 1/200


I think my test shots have allowed me to think bit more a bout composition and colour. The white marble is nice, but I think a really dark background might allow the eggs to stand out a bit more. Maybe a more creative composition, or some unusual looking eggs. I looked at the work of David Griffen who specialises in food photography. He has a great shot of normal and quail eggs below. The dark background allows the eggs to pop and the studio lighting really makes the difference. I think using this as inspiration will enhance my skills.

David Griffen
David Griffen

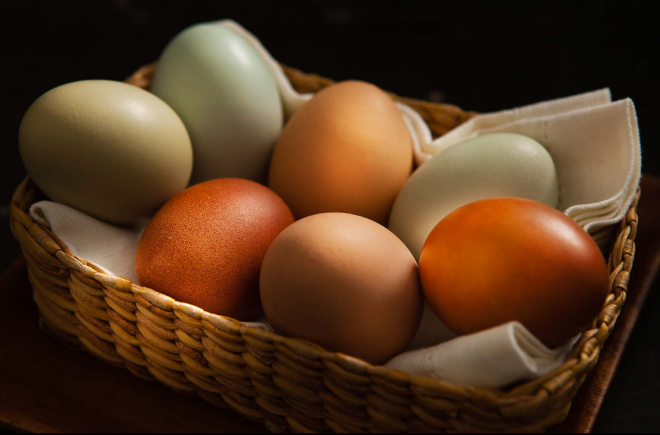
Another nice example is on Getty Images which is a stock image but showcases an array of different eggs on black using nice studio lighting, casting nice shadows.

183743013
Getty Images


Another option could be to use a low key approach with a black background such as below, by Francesco Tonelli. The composition is a a third at the bottom of the image and the light coming in from the right is casting lovely shadows.

Screen Shot 2016-06-16 at 17.30.49
Francesco Tonelli

The basket of eggs below is also quite nice, although I think less interesting than the above options.

Screen Shot 2016-06-16 at 17.30.13
Francesco Tonelli
Dairy – Egg-cellent – Unit 2 Test Shots

Veg – Macro Mushroom – Unit 2 Test Shots

Inspired by Francesco Tonelli, I decided to take some test shots of raw veg using a third/two third background composition. This allows the detail of the veg to draw your attention. I used a Nikon D600 with macro lens in daylight – well UK cloudy light.

My subject – a mushroom. I hate them, but they are undoubtedly beautiful and detailed on the inside.

I started at ISO 250 85mm f8 1/50 which was too dark but was conscious not to have a shutter speed too slow as I was hand held as I didn’t have a tripod. I moved the ISO up and down and experimented with using a fill board (in the form of a white piece of card). I found it really difficult to get the detail and the white outer all in focus because of the mixed depth of the subject.

I finally managed to get a shot I was happy with by increasing the ISO to 800 and using  the fill board to reflect light into the detail of the mushroom. I think using studio lighting would eliminate my problem of shutter speed and I could keep the ISO lower to ensure sharpness. I think the exposure is still quite dark and I could increase it in photoshop with the NEF file, but have left it as is for now. I also think that a rustic dark wood grain background going against the mushroom detail would be benificial to add some more interest to the shot.

DSC_2837
ISO 800 85mm f/8 1/50 with fill reflector


I tried some other compositions using angles, top down, black and white and a zoom burst.


I think the most successful was the below: The lighting improved as I was shooting and I could lower the ISO and increase the shutter speed dramatically. The subject was also easier to get in focus somehow. I focused on the centre point and the rest fell into place.

Again studio lighting would benefit this shot, and maybe a dark brown background to allow the white edge to pop out.

DSC_2910
ISO 160 85mm f7.1 1/80
Veg – Macro Mushroom – Unit 2 Test Shots

Sugar – Scones. Test and Final Shot.

Using a Nikon D600 with macro lens on the manual setting I decided to shoot a sugar themed subject,with a  lifestyle composition, inspired by photography taken by Helen Cathcart and Rosie Birkett. I wanted to utilise a new creative skill I’ve learnt so planned to use a fast shutter speed to capture falling icing sugar over the subject. I didn’t have access to a studio over the weekend so started testing at home.

My kitchen is a dark space so I knew I’d need the shutter speed to be low enough to let in enough light. I also had a large aperture f5.6 to create a shallow depth of field but also let enough light in too. I wanted ISO 100 to retain some sharpness; however after the initial set up shot, could see I’d have to increase dramatically. I went to ISO 500 which helped create a lighter shot (which I was impressed with given how dark my kitchen is.) I then realised two things when it came to testing the icing sugar falling:

1.) I would need a very fast shutter speed and would have to pump up the ISO to around 3200 to get an exposure when shooting at 1/1640.

2.) My background wasn’t showing the icing sugar!

So I decided to take the kitchen table into a room with more light and create a dark backdrop with a throw over a washing maiden:


This created a much better lighting situation to allow me to keep a high shutter speed and also to be able to see the icing sugar falling. The first in the line up above was shot at the same settings as in the kitchen and is much more vibrant, the light source coming in from the right casting a nice mood to the image. I then started to experiment with the icing sugar to try and gauge the perfect shutter speed to capture the particles. I had an assistant to do this as I didn’t have a tripod or a remote trigger.

I stayed at ISO 3200 which is massive but I felt the camera could handle it; a large f number 3.2, helped maintain a good amount of light in the lens. The first example (See above) is at shutter 1/1250, but the icing is very blurred; it still suggests movement but not as clear and dreamy as I’d like. The second is at 1/1600; I had to bump up the ISO to 4000 for this ! But the icing is better but still not as defined. Finally at ISO 4000, f3.2 and 1/2000 of a second I managed to get some nice sharp icing sugar particles creating an amazing still of movement.


I then placed in the jam and cream filled scones and started shooting at the chosen settings. My assistant served the sugar as I was shooting; I got about 10 shots, or which I’ve put three above. I loved how the composition was working, nearly two thirds of the shot being falling icing sugar. I realised that the focus was actually on the top of the centre scone though and was causing some out of focus issues, so I moved the focus point to the front of the cake stand which brought everything into focus. The f3.2 large aperture created a nice soft whimsical depth of field.

All in all I’m really happy with the final shot. The exposure could be slightly brighter, but given the limits I was pushing the camera in terms of ISO and shutter speed, this could be done in photoshop using the NEF file. I shot using auto white balance, but it could also maybe benefit from being a touch warmer in temperature. I could also photoshop out the sugar on the table which could be distracting, although I think it’s more realistic. I’m pleased with the hilights on the scones and jam. Maybe the cake stand could have been more modern. I think the shot would have benefited from being moved forward to drop the background out of focus and get rid of the creases, and also loose some of the table at the front which has gone soft in focus.

Final Shot:

DSC_3141 (2)
ISO 4000 40mm f3.3 1/2000


Sugar – Scones. Test and Final Shot.

Struggle – Shallow DOF

Whilst in Grizedale Forest – renowned for sculptures being dotted amongst acres of forest land. I stumbled upon this one, which was eery and disturbing given the surroundings.

It took me a while to be able to approach the sculpture to take a shot as it troubled me and felt all too real being at life size. However, the intricacy of woven metal creating a human figure was amazing. The man looked defined and strong despite his struggle with a rope around his neck.

I like the composition looking up, as though we’re following the sculptures gave towards the rope and also the direction of the trees and forest in the background.

I decided to focus on the hands gripping the rope to hold his own weight as they depict the only hope in his efforts to survive. Using a f5.6 aperture to get a shallow depth of field, I focused on the hands which allowed the rest of the forest to become slightly more out of focus, I would have liked it to be even more knocked back, but f5.6 was as large as I could go given I was zoomed in at 53mm.


IMG_2673
ISO 100 f5.6 1/40 53mm WB Cloudy


I took some more shots to give an clearer idea of the sculpture. There was a second man, who scared me too much to to approach, who was pulling the rope, the killer.

Struggle – Shallow DOF

Composition

There’s lots to taking into consideration with the composition of a photo but the main thing to remember is that we’re designing a picture. Currently we’re photographing to record, but by taking into consideration the below we can chose how to create an image.

The rule of thirds

By splitting a photo up into thirds down and across (a grid of 9) you can start to see how a composition should work.

The top third is background.

The middle third is middle distance.

The bottom third is foreground.

The strong elements should sit on the 4 intersecting points for best effect.

rule-of-thirds_mono-lake-lines
Grid breaking up the areas of the photo and points of interest

Below I have used two thirds sky and 3rd land for this landscape/skyscape.

IMG_2450_3

Similarly the same for the seagulls on top of the lamppost. Some people may say this is not particularly interesting, but it breaks the rules in terms of having no background. The space above the seagulls gives the image room to breath and no distractions allowing the focus to be on the two birds.

seaguls

Leading Lines

Leading lines draw the eye into the picture and help define the subject. They simplify the composition. Paths aren’t always straight but take you to a destination that might be missed in the shot.

Below is an example I took on Roanhead beach. The fence posts and path are directing the eye towards the sea and mountain.

IMG_2403bw

Strong Diagonals

Strong diagonals do a similar job to leading lines and bring a sense of movement to a shot. They connect one side of the composition to the other and point the eye in the direction is should travel.

Below is an example where I’ve subconsciously used diagonals. The beach shot sees the sand and stones as a diagonal which allows your eye to travel along the shore, moving towards the water. It adds movement as though the viewer can imagine walking along the sand, near the water, over to the dunes.

IMG_2456 copy

Layers

Help to create the impression of depth and reality. They simplify the picture and can be layers of colour, texture, light or shape.

Screen Shot 2016-04-23 at 17.26.00
Example of Layers – Dave Willis

Perspective & Symmetry

If it doubt use symmetry. It allows us to simplify the composition and give the impression of more, effectively doubling the image content. Symmetry creates order and avoids chaos in composition. Below are two shots I took in Kendal whilst at collage exploring composition. The old mill building isn’t that interesting but by shooting in symmetrically the composition is appealing to the eye. 

IMG_2598

The symmetry below is reflective, thus doubling the image. The bridge and buildings can be clearly seen in the water.

IMG_2566


Low and High Perspective

The use of an unusual perspective can help create impact and drama, suprising the viewerw with something that differs from our everyday view of the world.

Color

Colour gives the composition a lift, a mood, an atmosphere or a focal point. It adds impact. We discussed the colour wheel and and colours that work best together. Hot colours are red, orange and yellow. Cool colours are blue, green and violet. A little bit of red goes along way due to it being a colour we associate with danger, so we’re wired to recognise it.  It’s good to match red with green and blue with yellow or orange.

It’s also worth baring in mind how to add colour when there’s none around – for example having a bright coat/rucksack on a grey wet fell side.

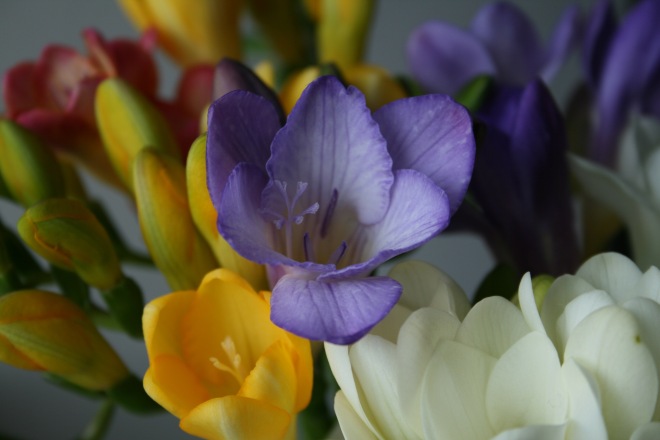
I always scroll past this photo I took of some flowers and it jumps out every time because of the violet and yellow contrast. ISO 200 55mm f6 11:50

Dave’s Three rules to remember were:

  • KISS  –  Keep it simple stupid.
    Avoid clutter in foreground and background.
    Consider simple colour and shape,
    Simple abstracts (brave and bold),
    Sillhouettes,
    Simple landscapes.


  • Have a Focal Point
    This should be the subject, make it obvious.

    Unless…

    it has something better, repeating pattern or texture perhaps.


  • Backgrounds Ruin Photos.
    Get rid of clutter and distracting things.
    Avoid pylons, cars, litter in the background.
    Look at the background first!
Composition

Wide DOF – Beach. Test and Final Shot.

The sun beams at the beach as the sun was going down were amazing and I though it would be worth going to shoot a wide DOF shot. I tried a couple of test shots using the manual setting. Initially the aperture was f10/1/500 but the shutter speed was too fast and resulted in under exposure. I then went to f/10 1/40 but this was over exposed ad looked flat and cold, removing the sunbeams from the shot.

I then started to get closer to a final shot and decided to use the tungsten WB setting to reflect the cold chill despite the sun being out. The setting enhances the sunbeams  in the skyscape but the beach turns a bit silhouette, but not enough as there’s still some detail present.

IMG_2450
f13 1/160 ISO 100 WB Tungsten – nearly silhouette

By slowing down the shutter and allowing more light I managed to get a final shot that captured the amazing sky and the detail of the swooping beach. The wide depth of field stretches out to sea and captures the amazing beams landing on the sea in the distance. I think the composition of the diagonal sand swooping out to the lit sea really takes you on a journey to sunny warmth even though it was cold. Taken on a Monday and as a nod to New Order, I’d call the shot Blue Monday.

IMG_2450_3
f13 1/80 ISO 100 WB Tungsten – Final Shot

I’ve also included some warmer shots by using a wide depth of field and the cloudy and daylight WB options adding some yellow/orange tones.

IMG_2456 copy
f13 1/80 ISO 100 WB Cloudy

I paricularly like the composition of the below, there is lots of untouched sand ripples in the foreground which leads you to the midground sand dunes and then further out to sea.

IMG_2419.jpg
f8 1/500 ISO 100 WB Daylight
Wide DOF – Beach. Test and Final Shot.